Anatomy of a Django/HTMX Project
djangojavascripthtmxpythonweb development
Introduction #
In a previous article I gave a very broad-brush description of HTMX and Alpine and their place in the modern web application tech stack. It was pretty light on detail, and it's difficult to draw any conclusions from a few snippets of code. I decided to put together a project that would provide a more in-depth look at how Django and HTMX work together.
The people at Thinkster have put together a "real world" demo app based on a Medium clone. Developers can copy this project and implement it using whatever frontend and backend they want, which works as a comparison between different frameworks and a learning exercise for each framework. A Medium clone is a good choice as a blog is a well-understood concept - no need to explain complex business requirements - and it also covers a lot of the basics needed for almost every serious web application out there, for example authentication, user permissions, form validation, REST API integration, and so on. Layouts and a Bootstrap theme are already provided so you don't have to spend a lot of time in design and it's easier to make comparisons between implementations given that the look-and-feel will be pretty much identical.
You can check out my implementation here, and if you want you can follow the README to run it locally. It's not a completely faithful implementation of the Thinkster spec, for example the spec really wants you to have separate frontend and backend implementations with a very specific API, whereas this implementation obviously is not put together in that way. Nevertheless it serves as a point of comparison with a traditional "SPA" implementation using, say, Django Rest Framework and React.
Start with a Django project and jazz it up #
Other than some discrete AJAX actions (more on which later) this is built as a traditional (non-SPA) project. I added hx-boost to provide instant "SPA-lite" navigation, similar to Turbolinks/Hotwire:
<body hx-boost="true">The out-of-the-box implementation of hx-boost will automatically swap the inner HTML of the <body> tag with the <body> content of a response, ignoring the <head> with the exception of the <title> tag, providing a smoother transition between pages when clicking links and posting forms than a full-page reload.
One thing I do when using hx-boost is to disable HTMX' history cache feature, which can sometimes result in funky behaviour when reloading a page with the back button:
<meta name="htmx-config" content='{"historyCacheSize": 0, "refreshOnHistoryMiss": false}'>Remember to pass the CSRF token #
If you try to use a non-GET action in Django you'll get a nasty HTTP 403 response by default unless you remember to pass the CSRF token. This is easy to do in forms: just use the {% csrf_token %} tag which renders the token inside a hidden <input>. If you are using hx-post or another non-GET HTMX action outside a form, you can't use this tag. Instead you'll have to include the X-CSRFToken request header, which Django will check if there's no hidden input form value. For example, our logout action looks like this:
  <a class="nav-link"
     href="javascript:void(0)"
     hx-post="{% url 'logout' %}"
     hx-target="body"
     hx-push-url="true"
     hx-headers='{"X-CSRFToken": "{{ csrf_token }}"}'>
     Sign Out
  </a>
It can get a bit verbose having to pass this hx-headers attribute to every single AJAX POST or DELETE action, but thankfully one of the basic concepts of HTMX is that a directive can be scoped to cover all child elements. For example, we can add the header to a top-level element:
<div class="article-page" hx-headers='{"X-CSRFToken": "{{ csrf_token }}"}'>
All HTMX actions inside <div> will now automatically include the X-CSRFToken header.
It's tempting to just add this directive just once to the <body> but this will result in an error - as hx-boost replaces the inner HTML, the value in the <body> attribute will be out of sync when Django renders a new HTML page with a fresh token. So it's better to set this attribute in an element inside the <body>.
The magic of OOB #
One challenge with the spec is the "Favorite" and "Follow" buttons in the article detail page. The buttons appear twice, at the top and bottom of the page. This makes sense, as you don't want to force the user to scroll back and forth when they want to do one of these actions, particularly if the article is very long. But it does present us with a difficulty.

Normally when we return an HTML snippet from an HTMX action like a button, we want to just return the button with the new state. So if you have a "Subscribe" action triggered from a button, you want to return a corresponding "Unsubscribe" button. From the user's point of view, clicking the button changes the icon or text from "Subscribe" to "Unsubscribe".
What if you want to change two or more elements though? This is tricky as HTMX expects the target to be one element. Even if I pass in a CSS selector it will choose the first selected element, not all elements matching the class.
The solution is to add "Out of Band" (OOB) elements to your response. For example, if we click the top "Favorite" button we return something like this:
  <button id="follow-top"
          hx-delete="/favorite/12345/"
          hx-swap="outerHTML"
          hx-target="this">
          Remove Favorite
          </button>

   <button id="follow-bottom"
          hx-delete="/favorite/12345/"
          hx-swap="outerHTML"
          hx-target="this"
          hx-swap-oob="true">
          Remove Favorite
          </button>
The second button has the directive hx-swap-oob="true" which instructs HTMX to insert this button in place of the matching ID in the DOM. From the user's point of view, both buttons are updated instantly. As I'm using the django-htmx middleware I can check the intended target from the request.htmx instance, for example:
oob_target = 'follow-bottom' if request.htmx.target == 'follow-top' else 'follow-top'You can add any number of OOB elements: for example, suppose you want to update the total amount in a shopping cart widget, or to render a "flash" message to the user to indicate a successful action (obviously if you are having to update a ton of discrete elements it might be easier to do a full page refresh or client redirect instead).
DRY your templates #
The best pattern for reuse of Django templates with HTMX is to break out functionality into partial templates. I follow the convention of prefixing partials with an underscore e.g. _article_form.html, some prefer partials subdirectories or eschewing templates altogether and rendering HTML partials using the django.utils.html.format_html function, but the basic pattern is the same.
For example, the article create/update page looks like this:
  <div class="col-md-10 offset-md-1 col-xs-12">
    {% include "articles/_article_form.html" %}
  </div>
When processing the form we can return the partial _article_form.html if the form contains errors:
return TemplateResponse(request, "articles/_article_form.html", {"form": form})Tweaking forms #
Django forms can be a bit tricky to customize, particularly if you want to add custom HTMX or Alpine attributes or CSS classes to form fields (as in the example below). A common pattern is to customize the widget after initial form creation e.g.:
  class MyForm(forms.Form):

      name = forms.CharField(required=True, max_length=60)

      def __init__(self, *args, **kwargs):
          super().__init__(*args, **kwargs)
          self.fields["name"].widget.attrs["class"] = "form-control"
There are two problems with this approach. First it reduces the reusability of your form: for example, suppose I want to use form-control-lg when displaying MyForm in one page, but form-control on another page? Second, it violates separation of concerns: the CSS class should really be something I can customize in the template, rather than in the form class. A frontend developer for example might wish to tweak class names, and having the class in the Python code makes that a bit harder, and customizing the form inside a Django view quickly leads to very clunky code:
  def my_view(request):

      if request.method == "POST":
          form = MyForm(request.POST)
          # validate, process etc....
      else:
          form = MyForm()

      # customize for our specific view...
      form.fields["name"].widget.attrs["class"] = "form-control"
      # and do the same for all our other fields...
django-crispy-forms is a popular library for providing a better management and customizability of Django forms and widgets, and works well with CSS frameworks such as Bootstrap. My personal favourite however is django-widget-tweaks which encourages customization directly in the templates, with the help of some custom tags:
  {% load widget_tweaks %}
  {% render_field form.name class+="form-control" hx-get="/lookup" placeholder="Your name" %}
This will render the input attributes into something like:
  <input type="text"
         name="name"
         id="id_name"
         class="form-control"
         hx-get="/lookup"
         placeholder="Your name">
A little bit of Alpine #
Finally, I added a little snippet of Alpine. There was so little Javascript required for this project that it was perhaps overkill to pull in the Alpine dependency but I felt it useful as an exercise.
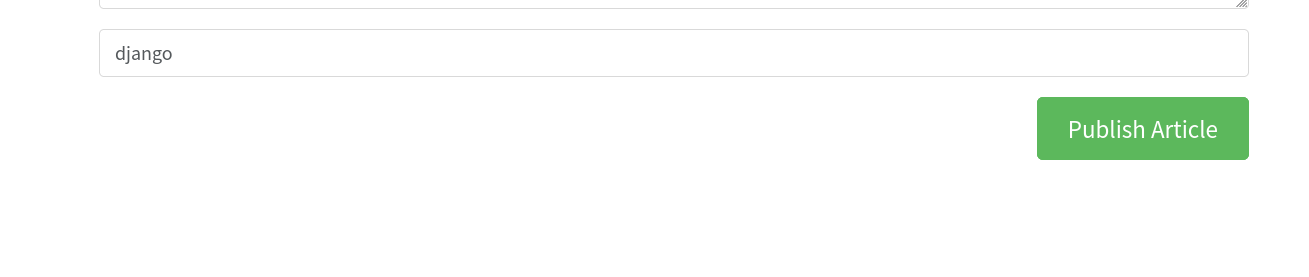
In the article form (i.e. when posting a new article or editing an existing article) there is a "Tags" input. The spec requires "typeahead" functionality so that when you start typing in the tags input any matching tags already in the database should be shown below the input:
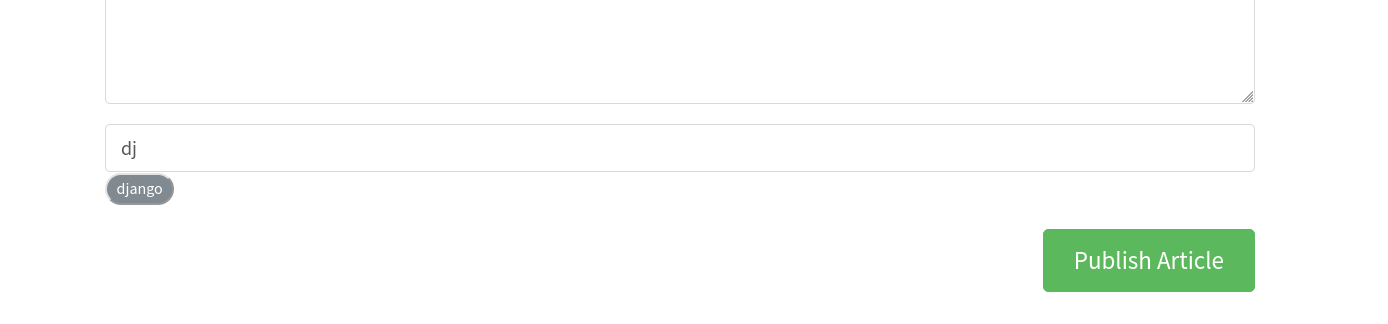
When clicking a tag, it should replace the last few letters you typed with that tag:
The whole implementation on the front end is just a few lines:
  <fieldset class="form-group"
            x-data="{
              insertTag(tag) {
                let tags = $refs.input.value.split(' ').slice(0, -1);
                tags.push(tag);
                $refs.input.value = tags.join(' ');
                $refs.input.focus();
                $refs.list.innerHTML = '';
              }
            }">
        {% url 'tags_autocomplete' as tags_autocomplete_url %}
        {% render_field form.tags class+="form-control" placeholder="Enter tags" x-ref="input" hx-trigger="keyup changed delay:200ms" hx-target="#tags-list" hx-swap="innerHTML" hx-get=tags_autocomplete_url autocomplete="off" %}
        <div class="tag-list" id="tags-list" x-ref="list"></div>
  </fieldset>
This shows how well Alpine and HTMX play together. Whenever the user starts typing some letters, HTMX will fetch the response - zero or more tags - into the tags-list element. Each tag looks like this:
<a class="tag" @click="insertTag('python')">python</a>Thus when the user clicks that tag, the text "python" is inserted into the input and the tag list is cleared. Alpine $refs and x-ref let us access specific elements with the x-data scope.
Obviously this is very simplistic implementation and doesn't cover a number of edge cases, but it shows how you can leverage a little bit of Javascript with Alpine to do a lot of heavy lifting.